

spring 2019
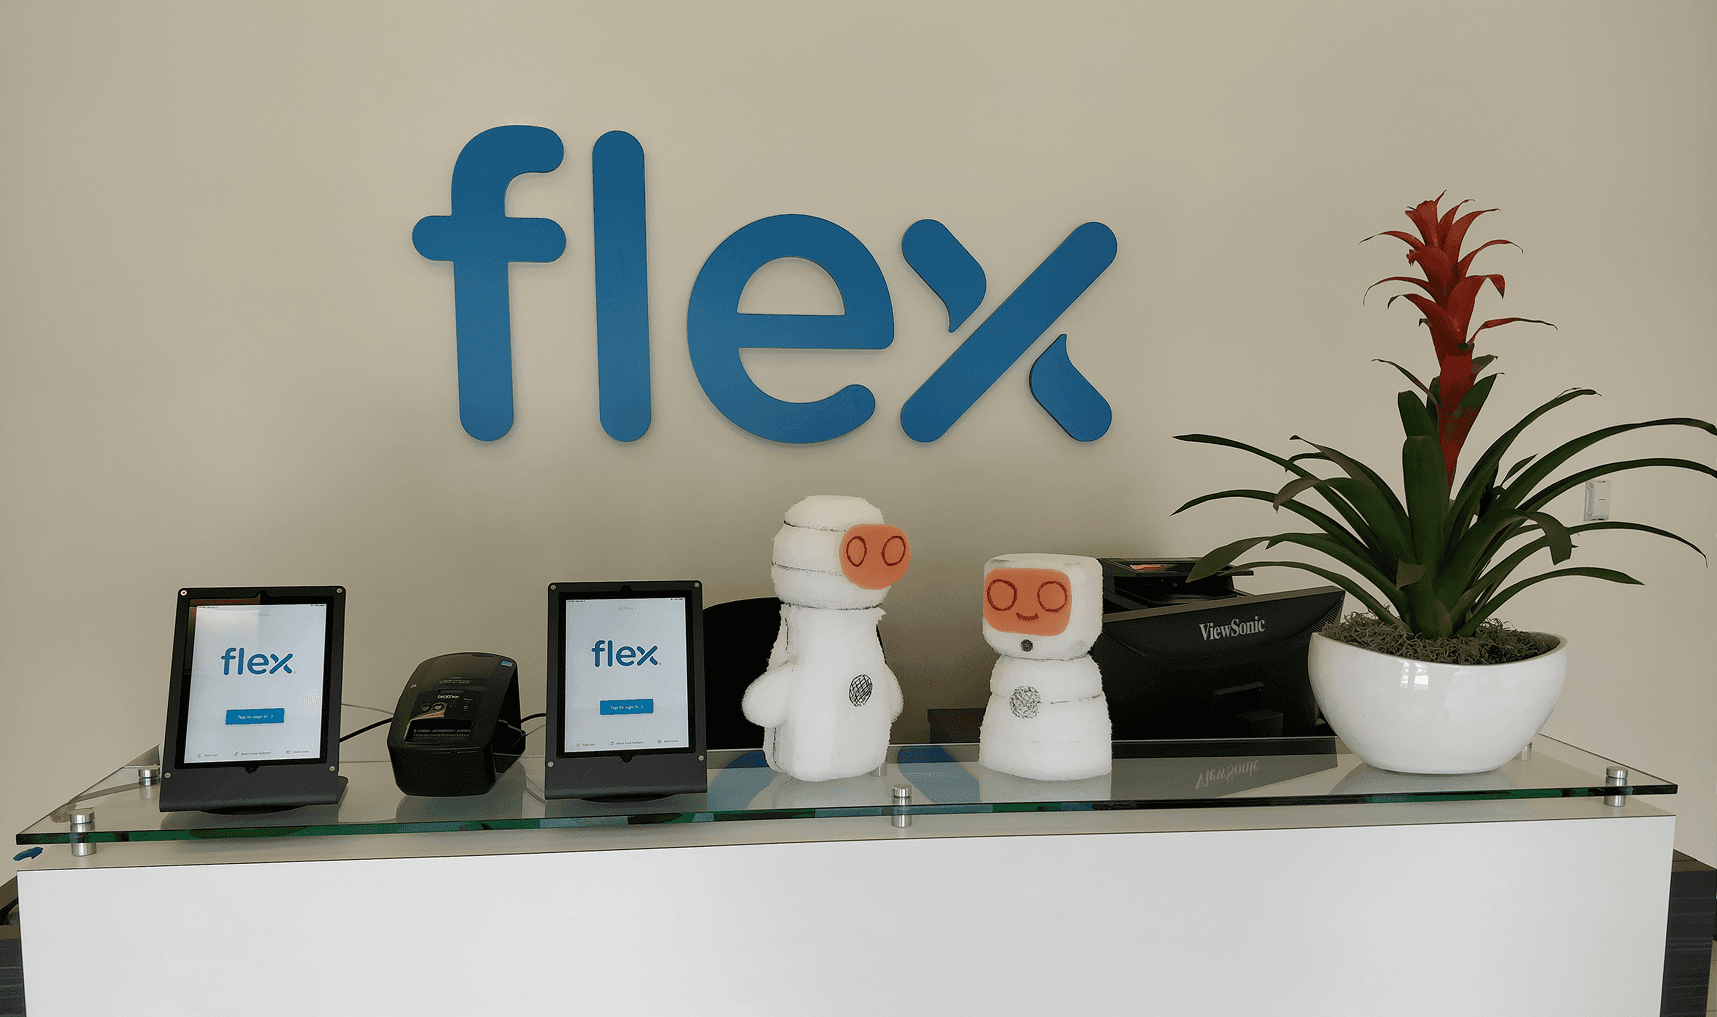
Independent design and build of a robot greeting team in Flex's front lobby to guide guests through sign-in and provide a novel first impression.
Flex's Silicon Valley Innovation Center is a small early-stage product consulting group within Flex focused on sensor technology applications and proof-of-concept product prototyping. The group frequently hosts potential clients who go on a guided tour of a demo area of the group's past projects. Clients come in through the lobby and need to sign in on an existing tablet before their host comes out to greet them.
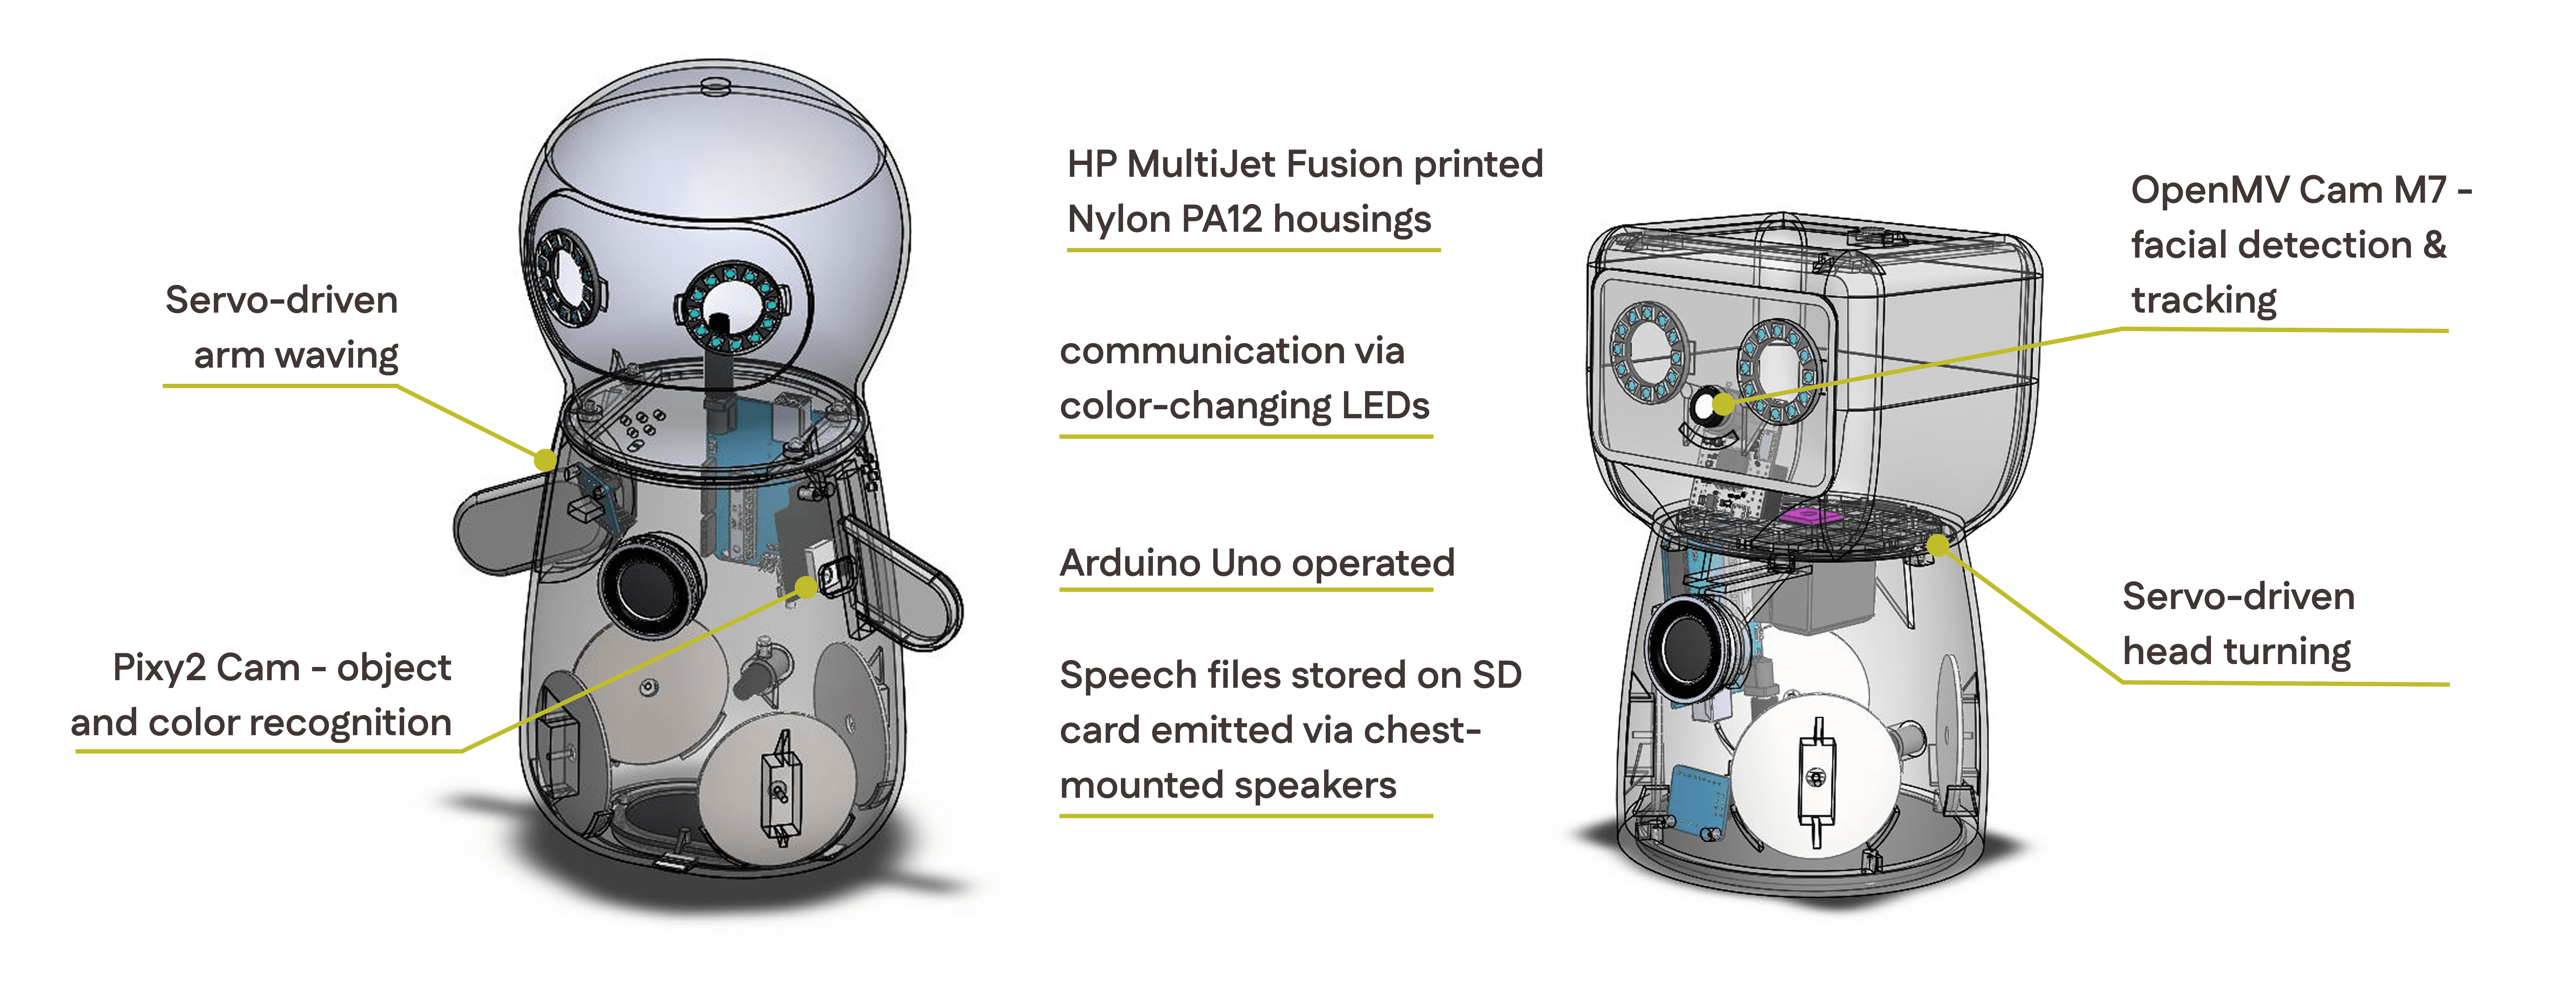
Key features of the duo - full SolidWorks assemblies
This project started off very open-ended, as a prompt for selecting an independent co-op project. The prompt was "a team of robots accomplishing a task." In the 4-month scope of my project, I saw an opportunity in the lobby sign-in experience to create something fun and personally challenging.
I started off with 10 form factor sketches, and surveyed the team to come up with two final form factors that I fabricated into foam models. This was done in parallel with writing design requirements for the key functions of the two-robot team. I wrote a storyboard and script for the entire interaction, and drew up electrical block diagrams. I planned & managed my timeline in MS Project.
Robot 1 "0.1134" can detect human faces with the OpenMV Cam M7 and track the detected face in 1 degree of freedom (neck rotation about vertical axis). It speaks through its chest-mounted speaker and changes the color of its LED eyes to trigger conversation cues in Robot 2.
Robot 2 "14" can detect the color change of Robot 1's eyes through a side-mounted Pixy2 Cam using colored object recognition, and in response to this cue play conversational audio files through its chest-mounted speaker. It changes its eye color to match Robot 1 and waves its right arm at the approaching guest.
Subassembly prototyping
I identified the critical-to-function subassemblies of the final two robots and created these prototypes first to ensure function before pulling the plug on final design decisions. These were: facial tracking (OpenMV-Arduino-Servo communication path), Pixy2 recognition of LED color changes, and the audio path (SD card reader-Arduino-Amp-Speaker path).
For the eye interface, I vacuum-formed & trimmed my own part using a mold I modeled and subsequently 3D-printed next door.
foam models

block diagram for Robot 1
facial tracking prototype with OpenMV Cam M7

neck turning interface with servo motor

3D printed vacuum-forming mold
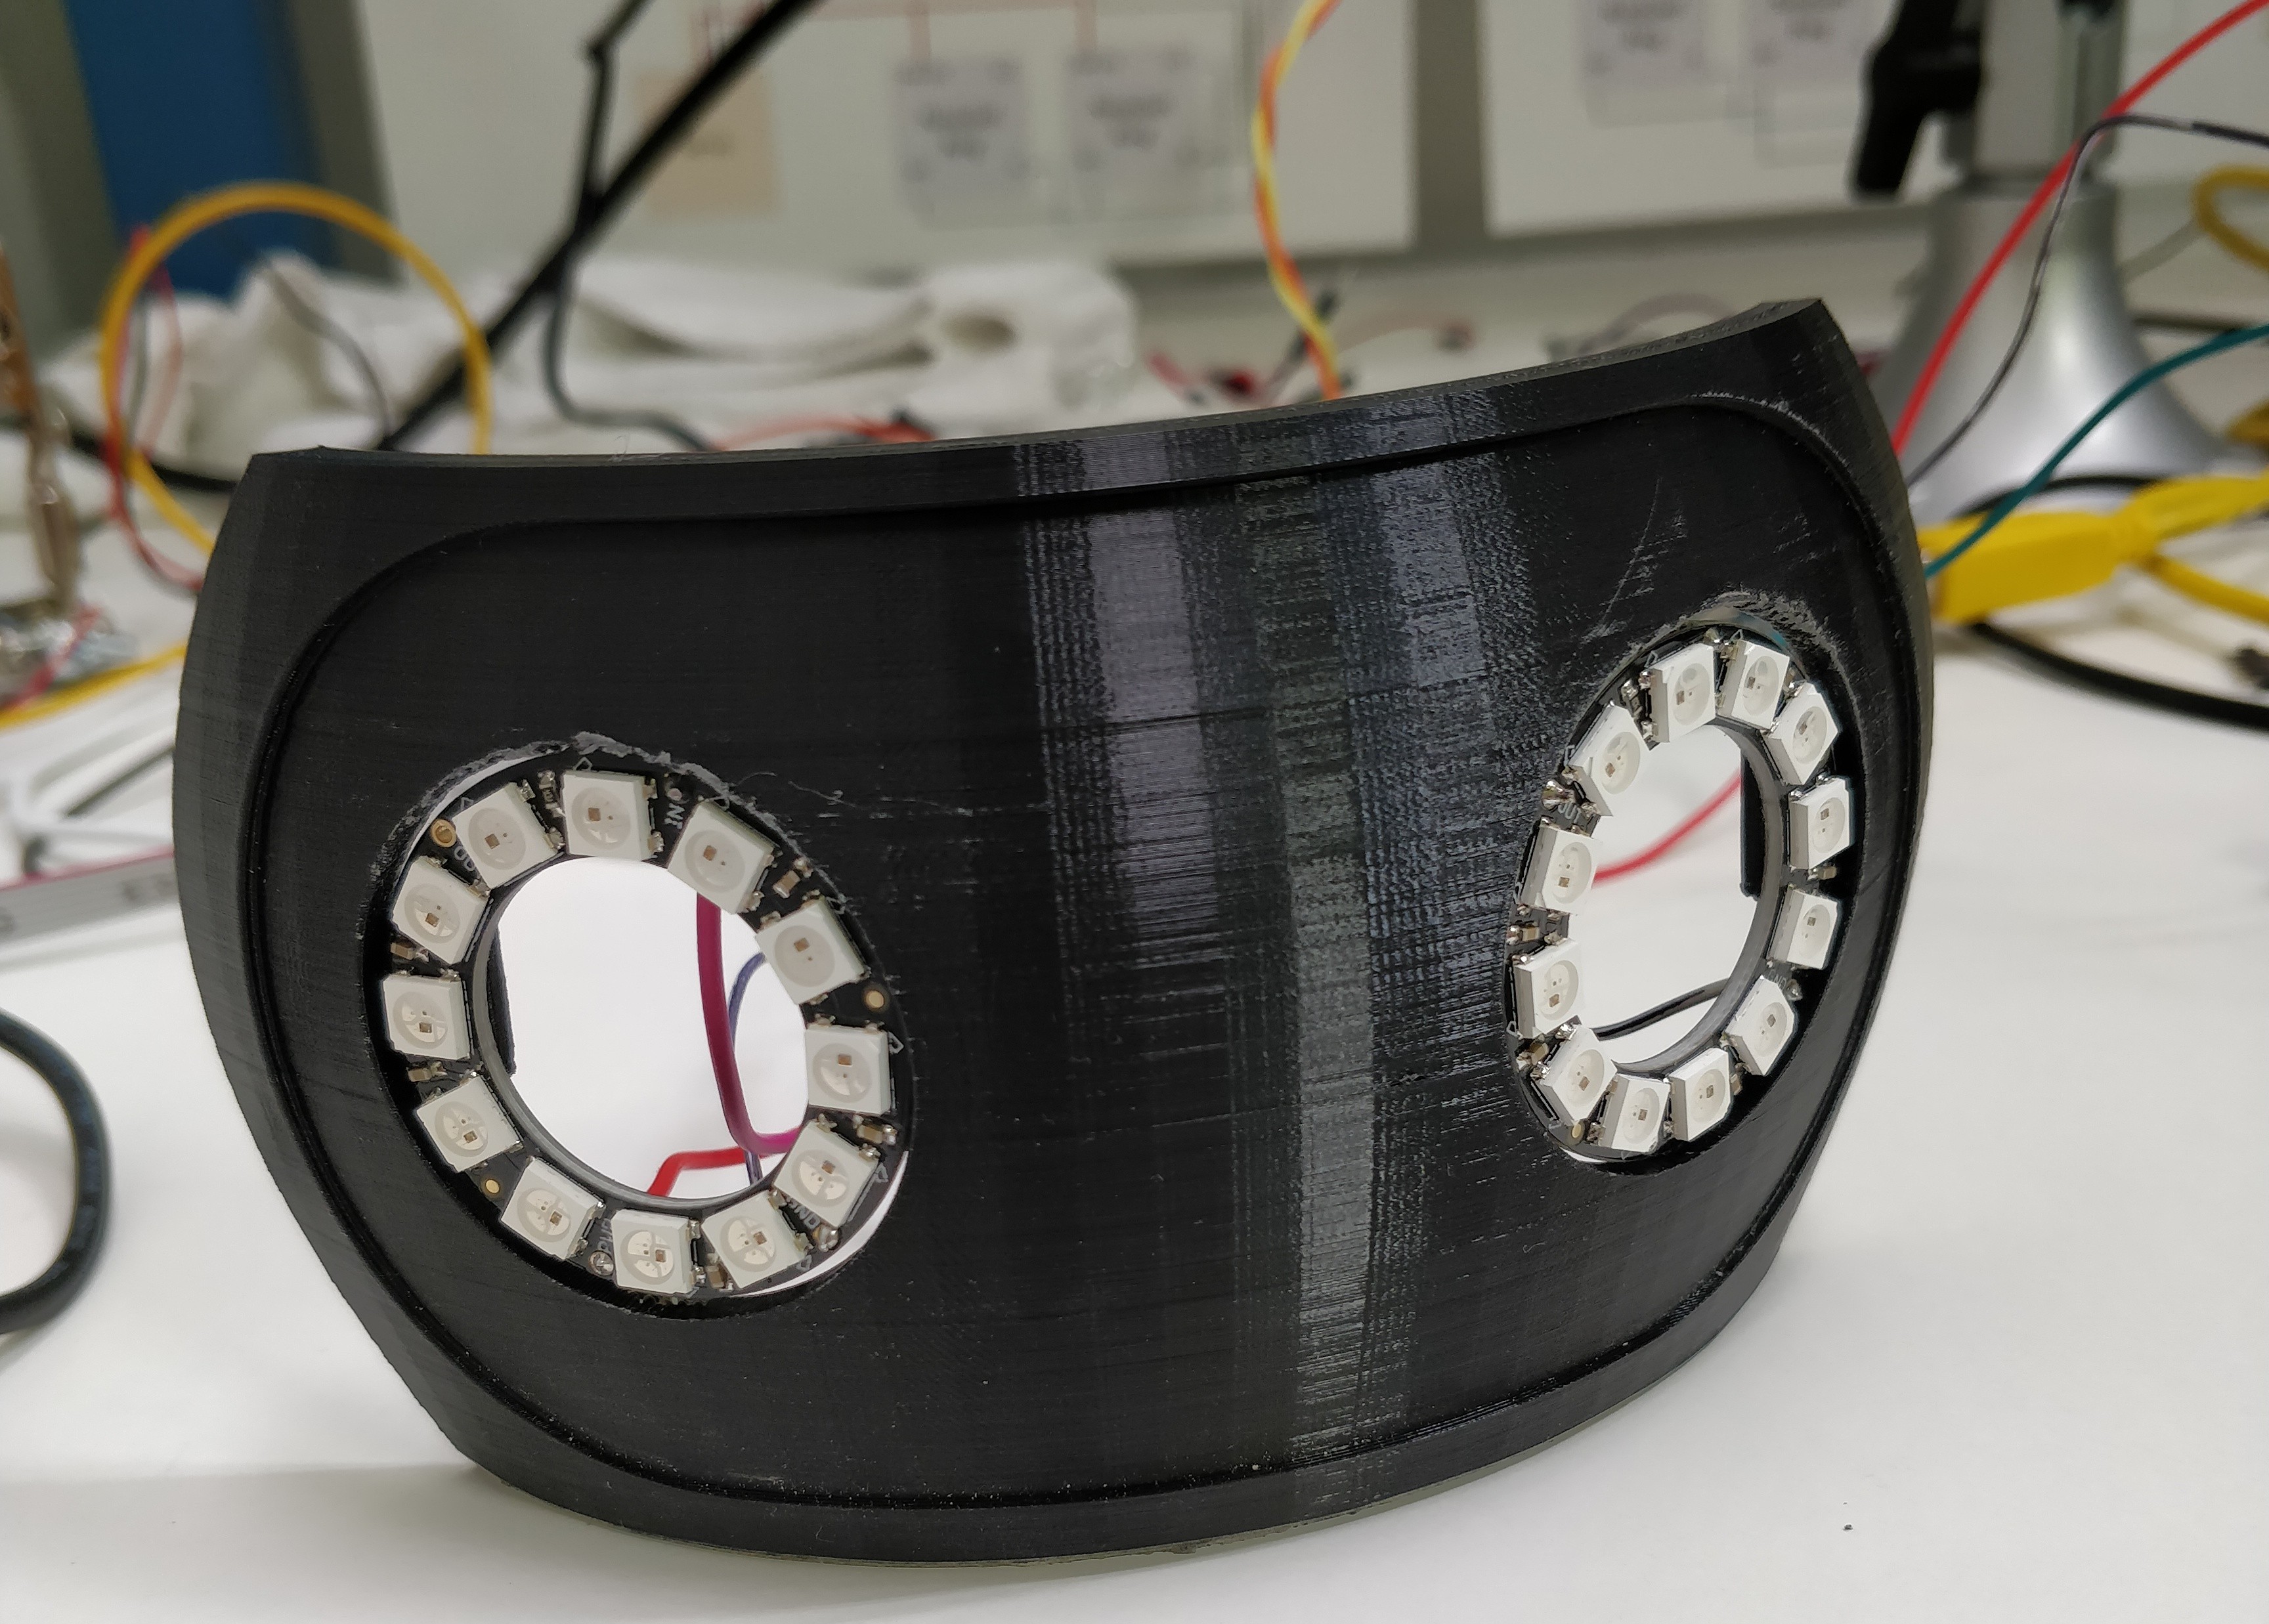
bare LEDs fit-up

vacuum-form part applied
Final modeling, printing, and assembly
Both robots were entirely CAD modeled in SolidWorks using both solid modeling and surfacing tools, with careful attention to design for assembly - such as the inclusion of large cavity access holes, set screws to hold cables and connectors in place, and tool access paths.
Here is a video of the entire interaction from start to finish. The short robot activates from its set state of blue eyes when it sees a human face and activates the tall robot from there, who starts waving its arm. You can see the short robot facial tracking when the camera-person moves from side to side in order to maintain "eye contact".
Challenges & Acknowledgements
This project challenged me to learn lots of new things and I leaned on quite a few of my colleagues for help.
The biggest challenge I encountered was that for the tall robot, the Pixy2 camera communicated over the SPI bus as a slave to the Arduino. However, the SD card reader that held the audio speech files also communicated over the SPI bus, and I found through testing with the oscilloscope with Glenn (Principal EE) that even when I told the Pixy2 slave select to go low, it always remained high, interfering with the audio signal that I wanted to call from the SD card reader. This was an unanticipated electrical challenge during the last two days of my project that I couldn't fix - the Arduino hardware to Pixy2 Cam link was not functioning as intended. I turned to my brilliant fellow co-op friends Anthony and Ian to fix the problem on a software level, and they helped me move the tall robot's speech functions entirely to a Raspberry Pi, restoring the robot's functionality but departing from the idea that it could be run from only an Arduino Uno.
Many thanks to Glenn for electrical counsel, Brendan for the vacuum-forming tutorial, Anthony and Ian for lots of programming counsel and the last minute Raspberry Pi save, my desk neighbor Mukul for mechanical design feedback, and to my supervisor and mentor Charles for guiding the project from the beginning.
kalinais@stanford.edu
messenger pigeon alternatives